A couple of years ago I wanted to reach more people and work with others that were not local to me. I had not ever expected that one day it would be the most vital source of my income, E-Design. I know that many in the interior and design world are looking to expand their business and I wanted to share how interior e-design works, well, at least how it works for me.
How Interior E-Design Works
This past month I was fortunate enough to gain three e-design clients. Two of them are more of an E-design consulting gig while one is a full living room e-design.
The difference between the two: Consulting is more of a hand-holding gig, with, of course, design suggestions to an already established plan. While full e-design means that the client has not even started the process and I will select everything plus create a floor plan.
So, I wanted to share how interior e-design works with my recent e-design kitchen remodel client who lives in Pennsylvania. The kitchen had water damage recently and it was necessary to remodel the kitchen. To have the job completed during this unprecedented time (COVID-19) the homeowners have been staying out of state in a second home while the contractors are in their home. Very unique circumstances for everyone involved and working remotely.
Here are the steps on how I work when it comes to interior e-design clients.
Step 1: Establish Relationship and Needs
I have worked with this client before so we were able to just jump right into it. BUT, if it is a new relationship I highly suggest to establish an agreed-upon Scope Of Work, pricing, how you work and provide your client with a design questionnaire. An example of my questionnaire is available for purchase as it is very similar to my Staging Client Questionnaire. I also have a video series on how to expand your design/staging business to an E-Design model.
Step 2: Receive Copies of Floor Plans / Measurements / Photos
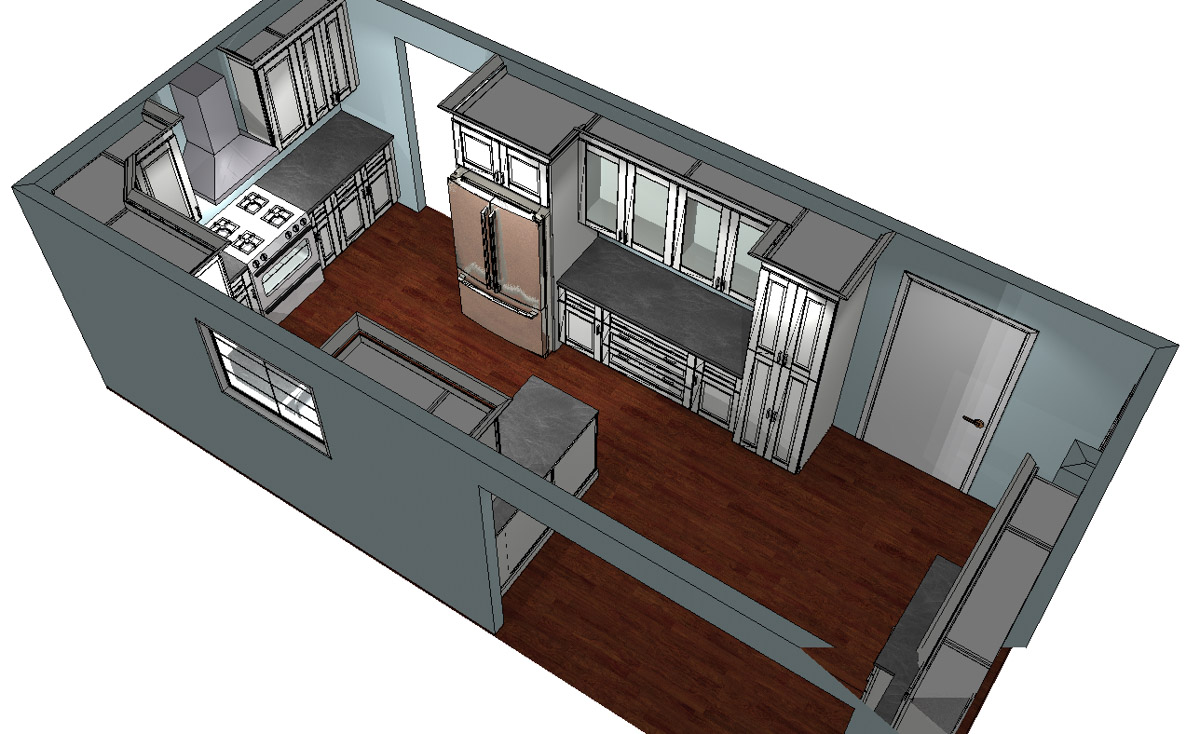
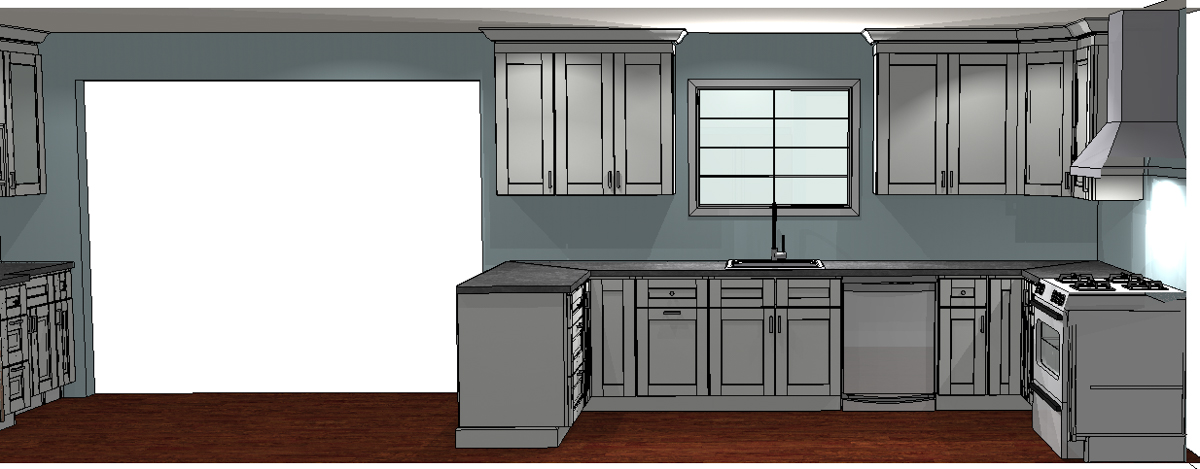
For this project, the client had a kitchen designer and I was hired to help finalize the finishes. Having a copy of the measurements is always a must. For my living room e-design client, I had the client provide me with measurements based on a checklist that we completed together through a video chat.
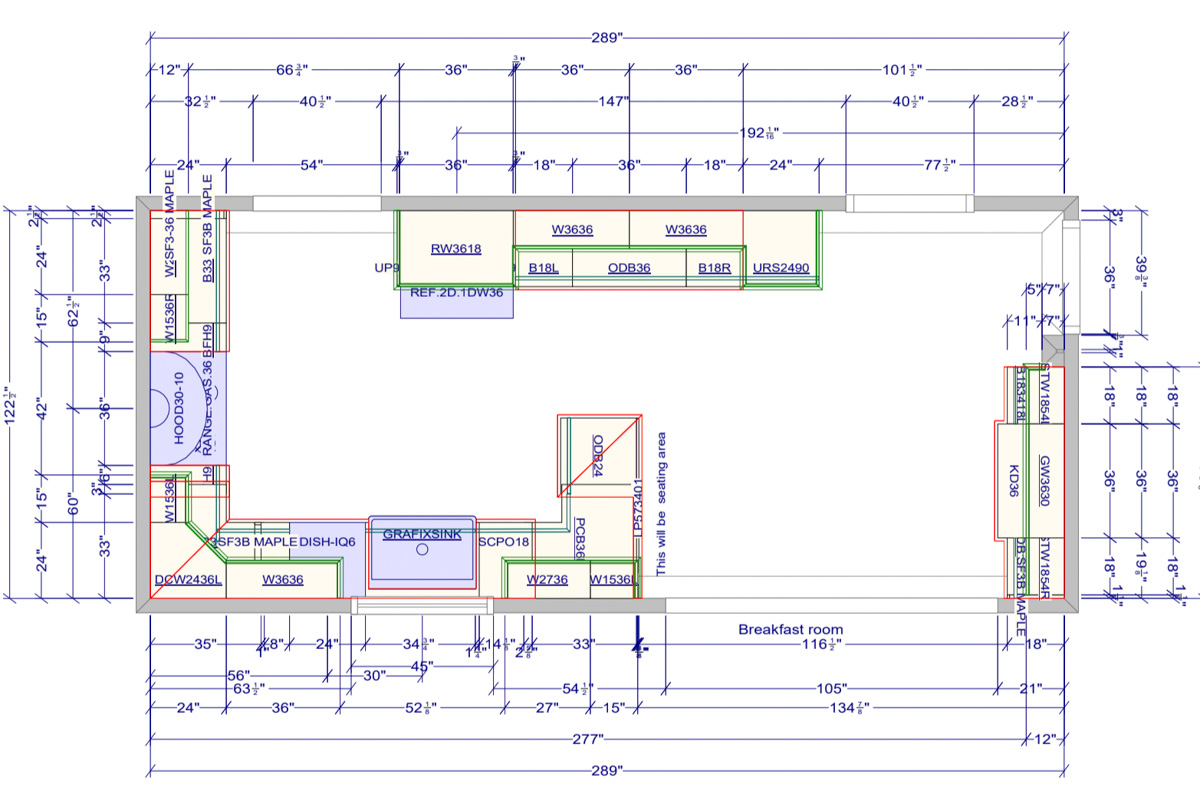
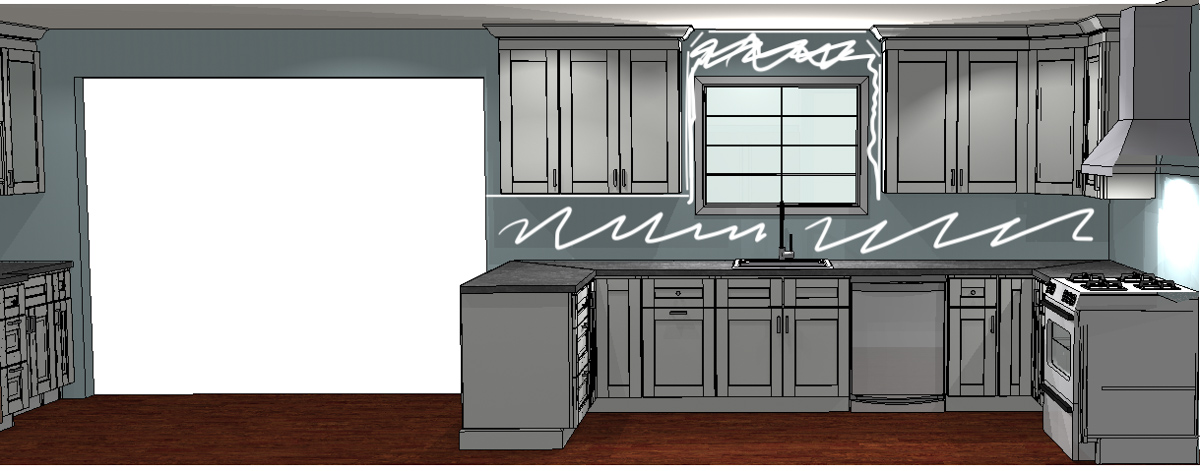
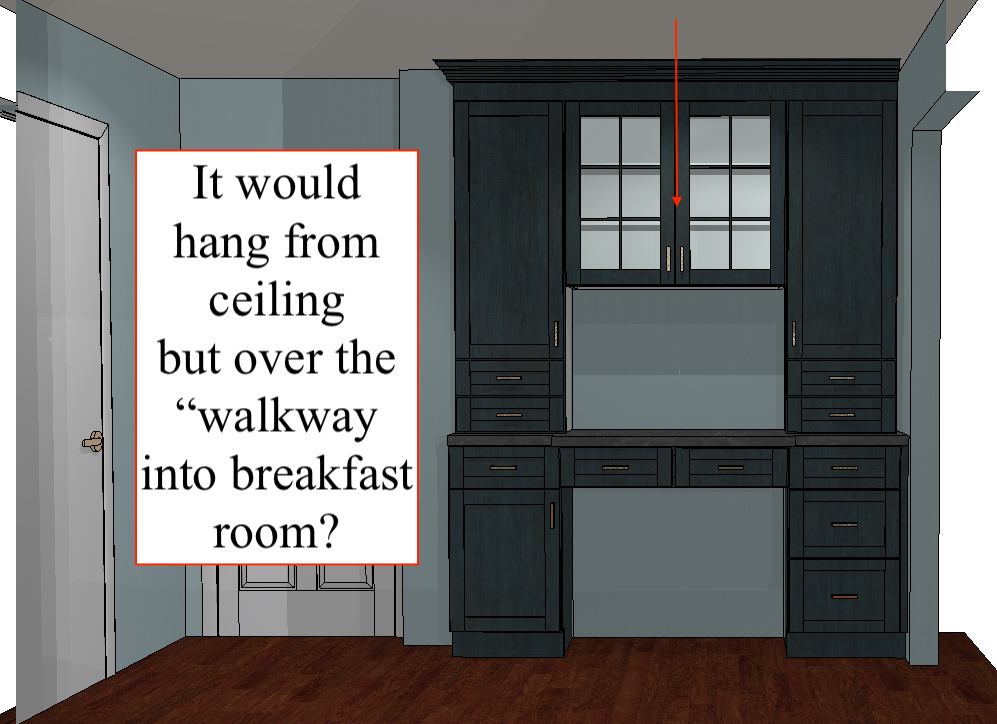
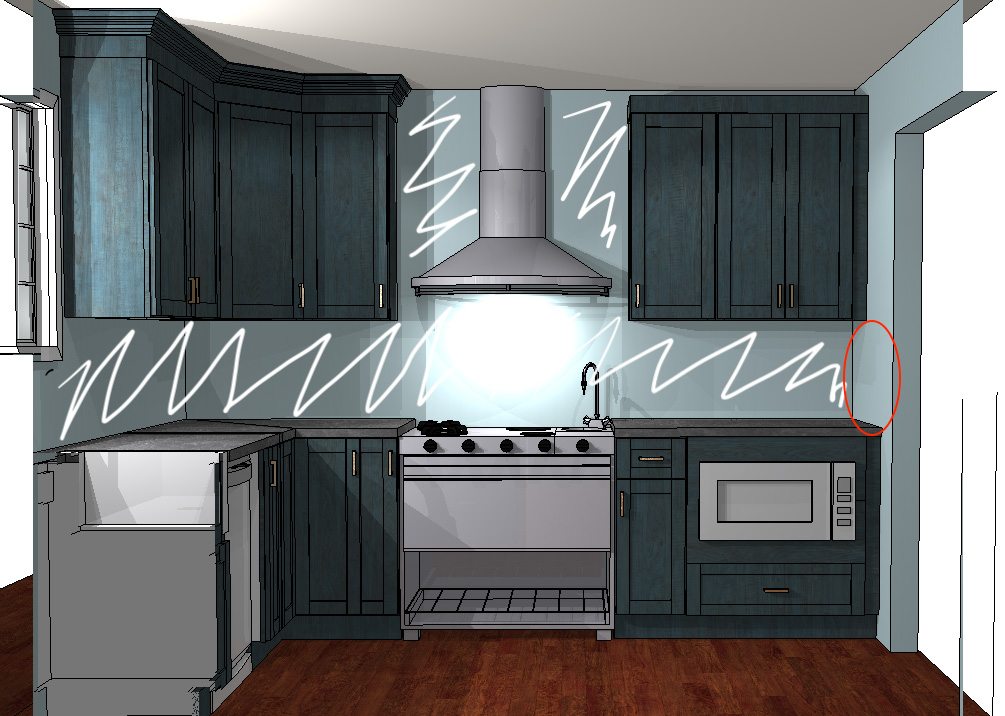
It’s great to have the plans because you can copy the jpegs and use them to convey notes. As you can see below, I used the existing jpegs/plans and I was able to convey how backsplash tile should be installed or a note on lighting.
Step 3: Filing / Documentation
I use OneNote for all my projects. All my clients are filed by year and then by location/project name. Using location, state name for e-design clients, and street names for local clients.
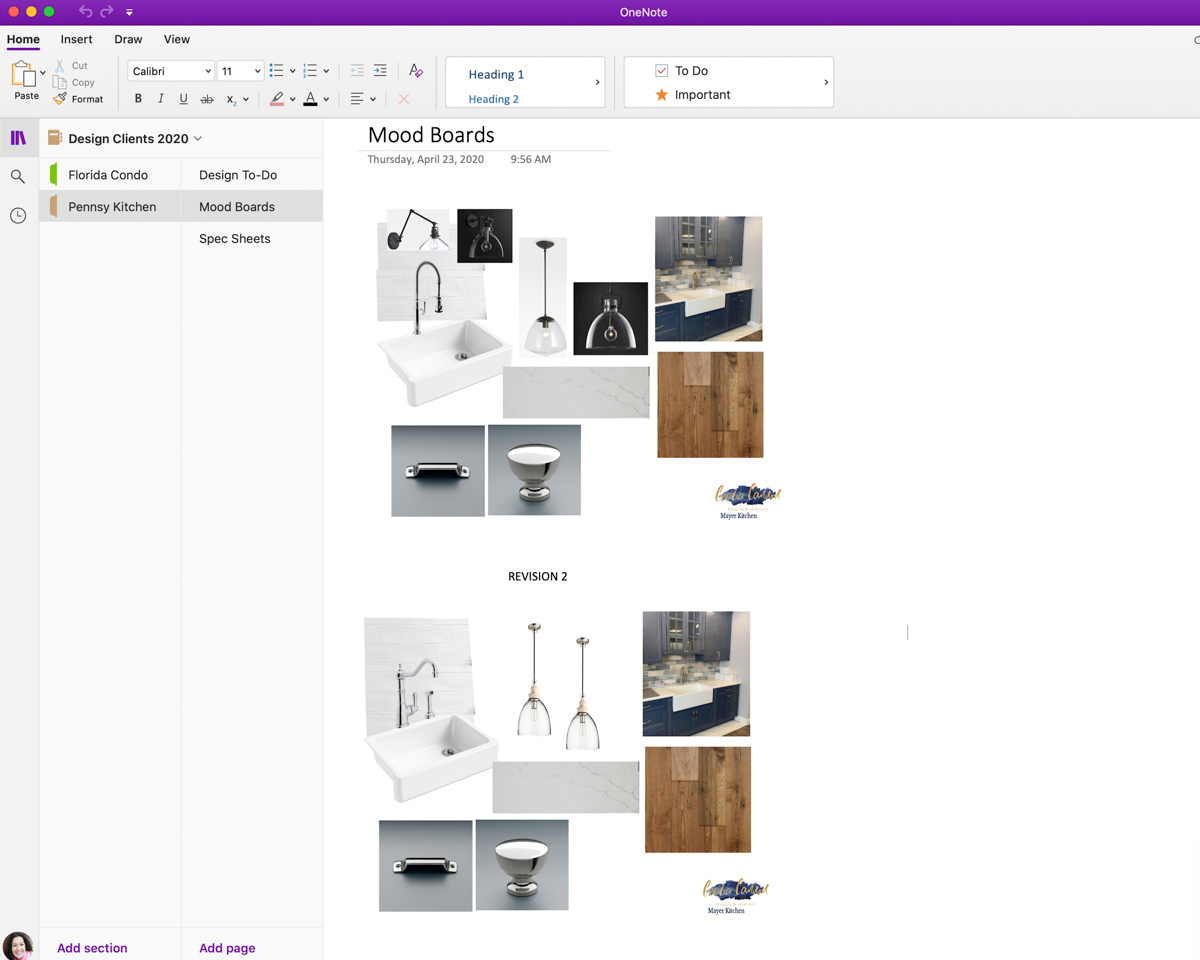
As you can see below; this is my Pennsylvania Client. My main subfolders are always:
- To-Do check list
- Mood Boards (all of them as they change and progress)
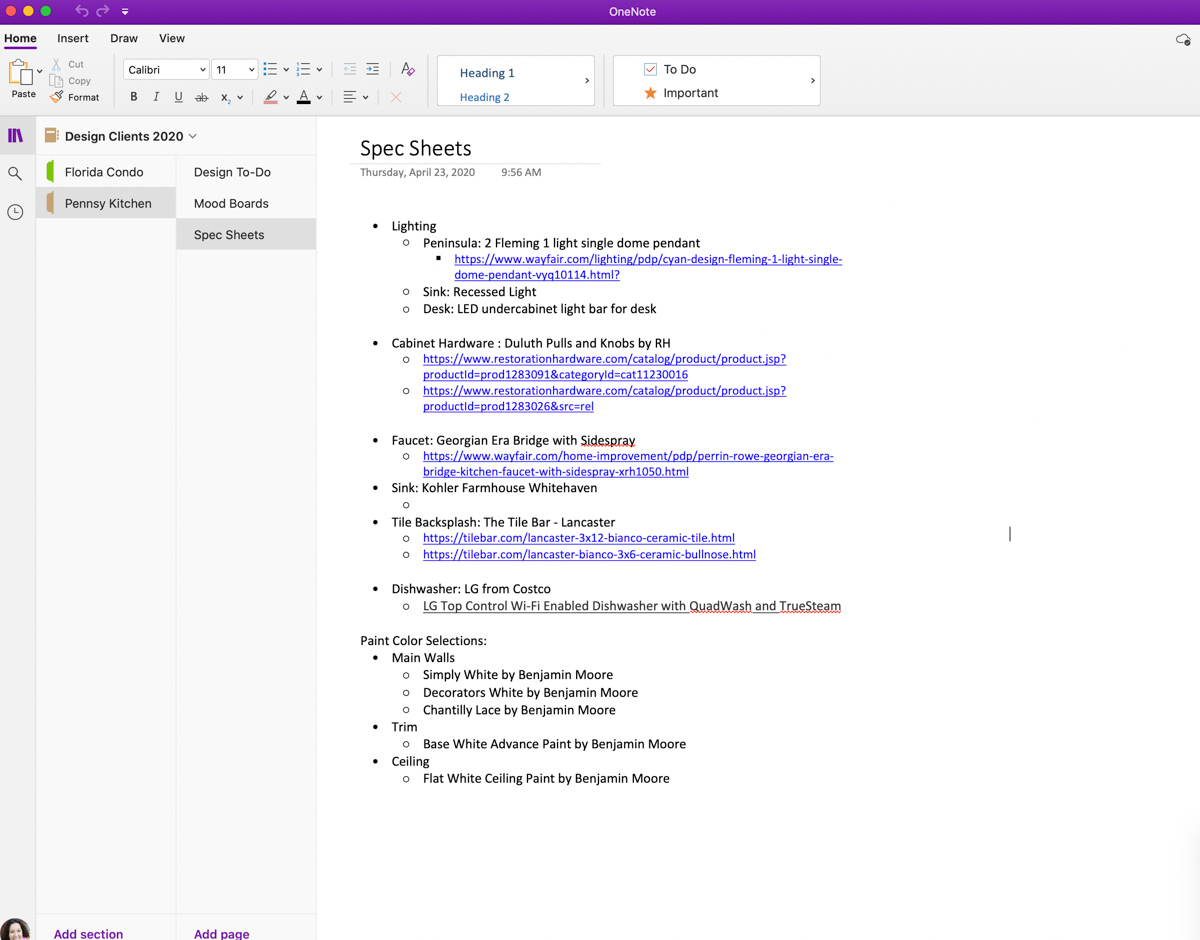
- Spec Sheets
- Budget/Purchases
- Floor Plans
- Contract
- Important Email (I save pdf copies of emails in subfolders)
This client was not as involved so I did not need all the sub-folders
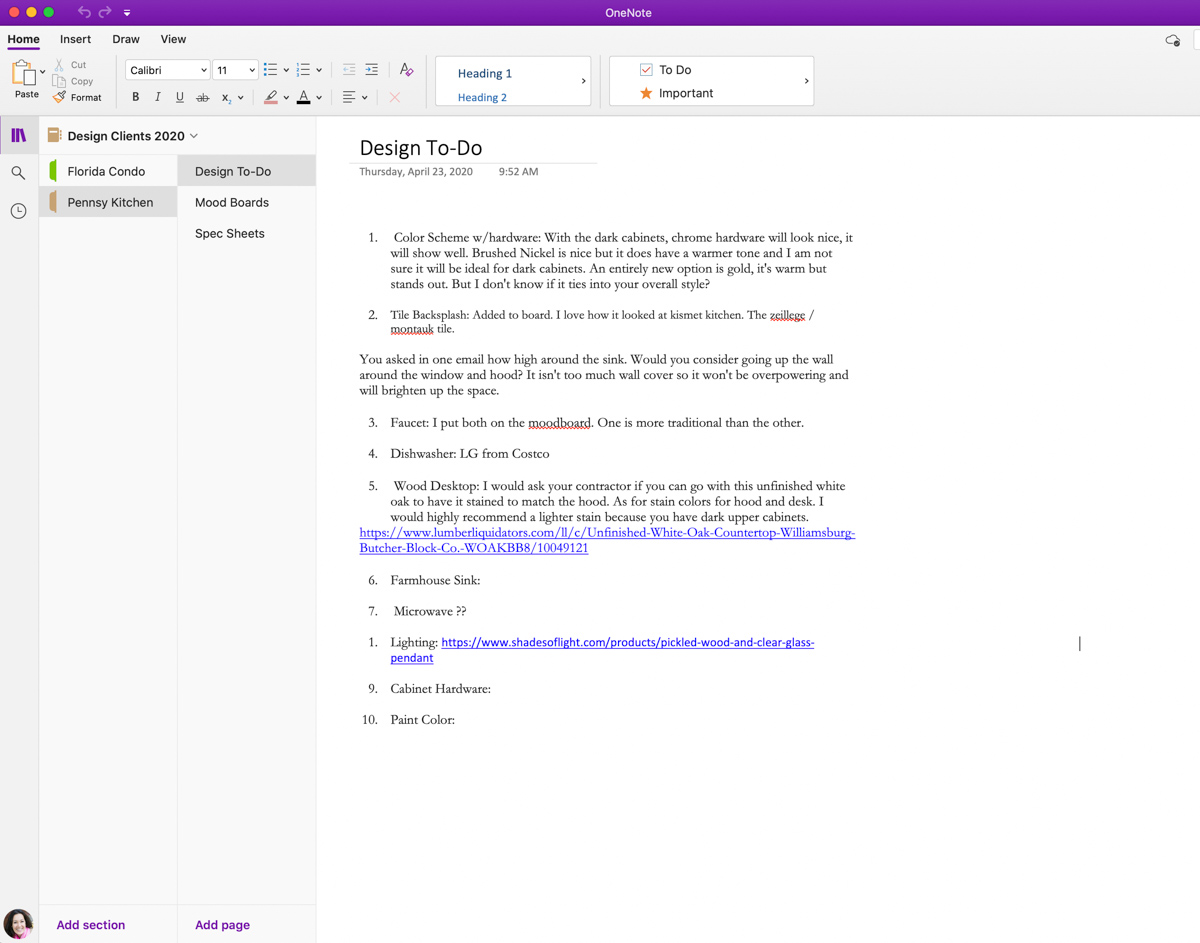
Step 4: Constant Email Communication per subject
To keep everything organized I create a folder in my gmail with the client location name again, same as Onenote. Then, emails are sent and organized by subject. For instance, if I send an email regarding “lighting” that is the subject and I try to not mix other topics. ALWAYS KEEP everything. No deleted emails.

Step 5: Starting Pinning
I still use Pinterest over Houzz and love it. I have some clients that prefer Houzz for saving and I will use that for them, but then I double save it over on Pinterest. The board is easily accessible without passwords to my clients and it has a better mobile interface.
All my client boards start the same on Pinterest, CLIENT :: Location Name.
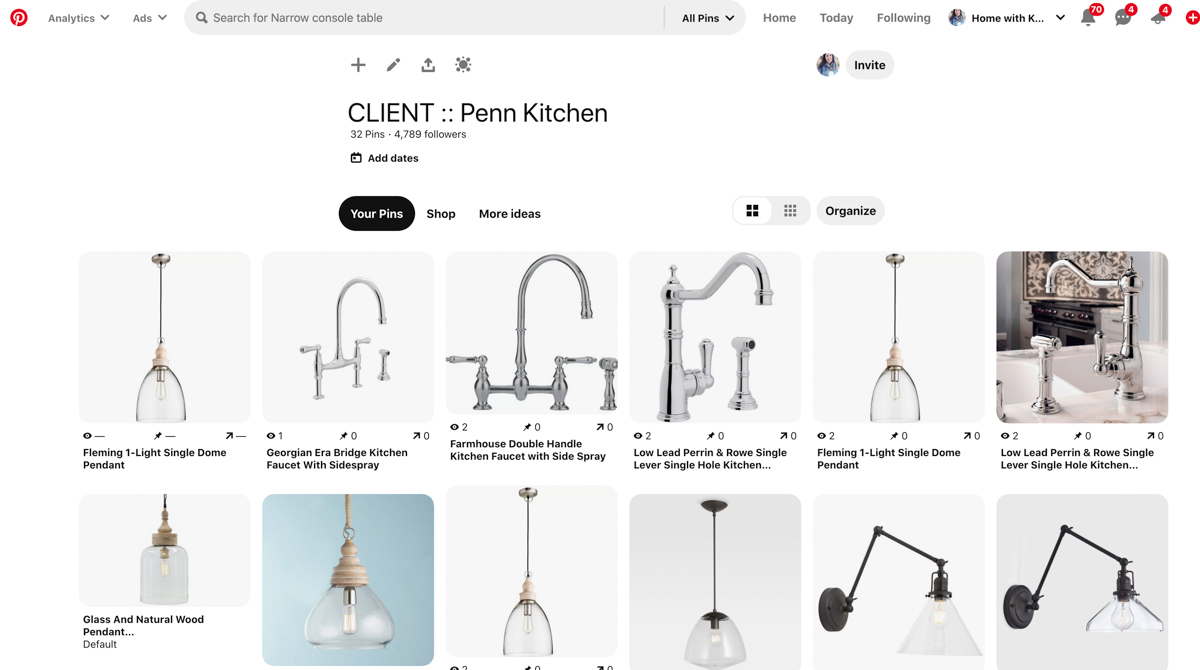
Step 6: Start Creating Mood Boards
I use Design Files for mood boards and so much more. Design Files is a great design studio. I can download the board as a jpeg and share it via email or text. OR ,
I can add the vendor / pricing / link directly within the board and email the client within the app. The client can easily click on anything on the board and it will take them directly to the vendor site to purchase.
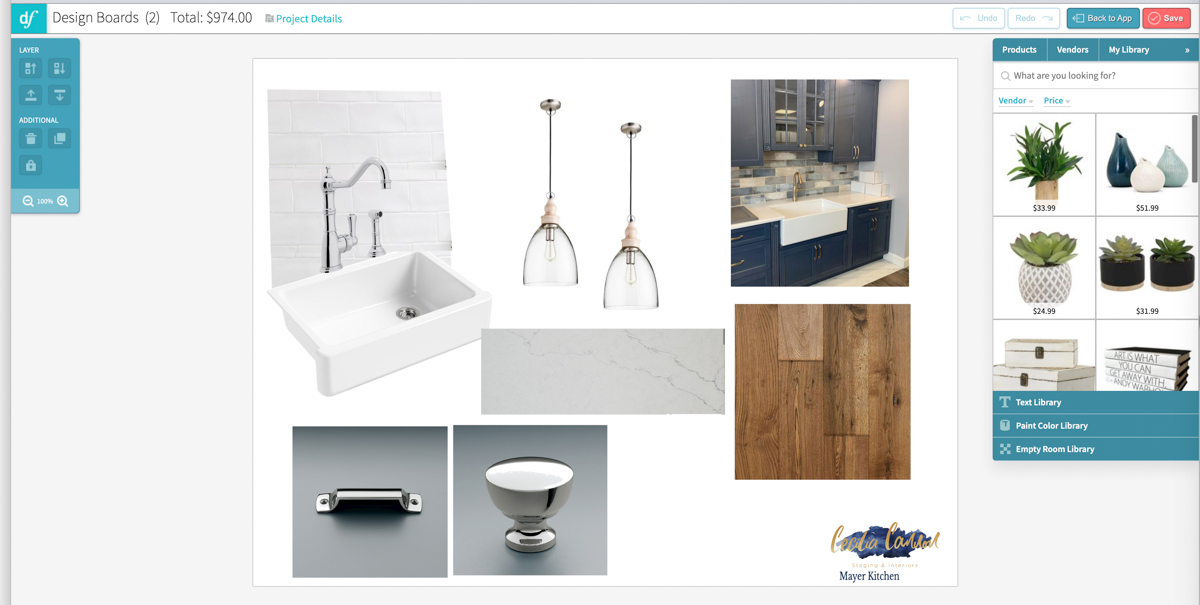
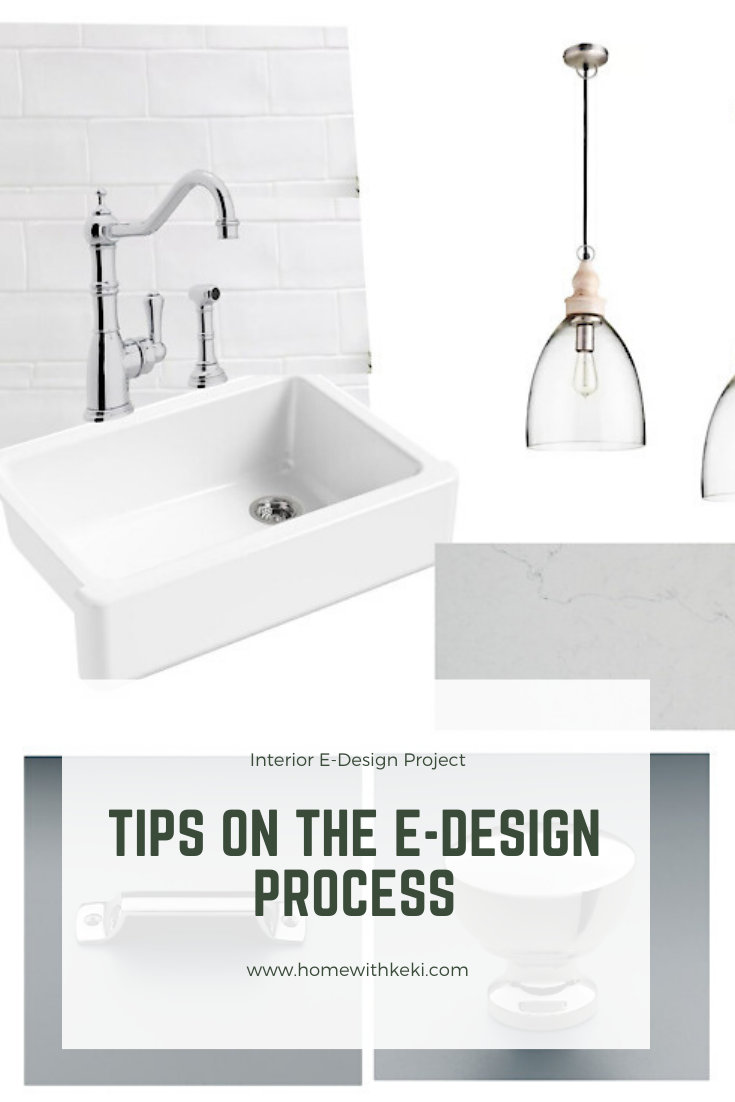
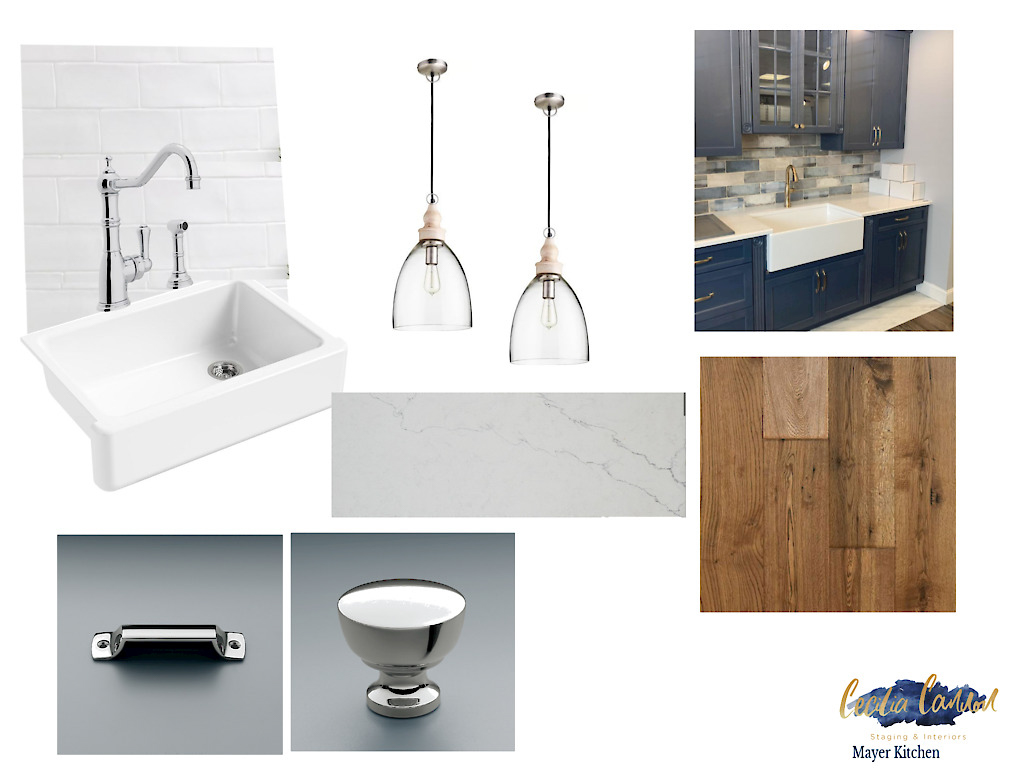
Here is an example of the initial design board based on communication from client and some of my visions.
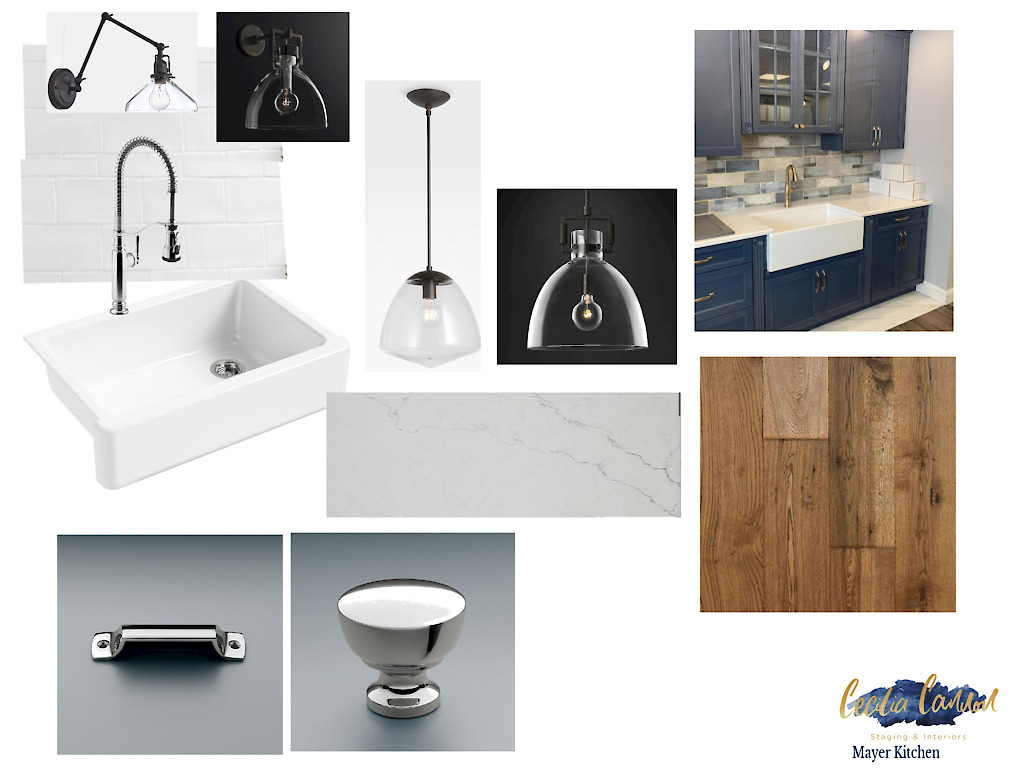
Shop The Post: White Farmhouse Sink // Chefs Style Faucet // Swing Arm Wall Sconce // Clear Dome Pendant // Chrome Cup Pulls // Chrome Knobs
As mentioned, I save all these within my online notes too. My OneNote is a cloud account, I can access it from any and all devices anywhere. It’s simply a digital filing system.
Below, you see how the mood boards change from top to bottom by changes made.
Step 7: Maintain Spec Sheets
As the client begins to agree on items on the board via email or text I make sure to keep a running record of the spec sheets aka Specification Sheets. Which include:
- Product Name
- Vendor
- Dimensions
- Color
- Price
For my E-Design clients I simply place name / color / and direct link. When needed I can easily share this document with them in an email or text.
Step 8: Finalize Design Plans
After a couple of weeks of consistent communication, planning and helping my client visualize what she had picked out herself, she was then able to purchase what she wanted.

Pin For Later
